Using 3D modelling to Turn a Piece of Concept Art of an Environment in to a Model- 24th November 2016
This project a need to take a piece of concept a like from another artist. The reason we are taking concept art from another artist is because our main focus in this project is modelling, making a piece of concept art is entirely different job from modelling in the gaming industry the modeller would model and the concept artist would make the concept art, This is usually how it works in the bigger gaming companies.
I will first need to make a mood board of concept art I would want to adapt into a model format.
I have chose eight different pieces of concept art that I would want to model, texture and UV. I will pick three of these to do experiments on and artist research. The I will pick one to model for my final piece.


Update my blog.
Week 3
I will start blocking out my model.
Update my blog.
Weeks 4-6
I will finish the blocking out and finish the modelling stage.
Update my blog.
Weeks 7-11
I will use the rest of the project to Uv and Texture my model.
Update my blog.
Do my Evaluation.
What UVs are and Why They are use in Modelling- 1st December 2016
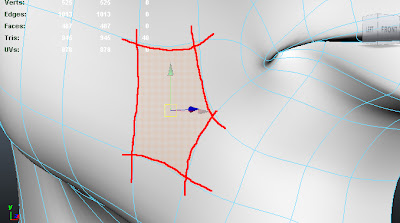
Uvs are nets you would find for 3D shapes for example A cube net is a UV.
 UV's are used to add textures, colour and shading to your model. These are an extremely important part of the modelling process if you are modelling in gaming or film e.t.c they will expect you to know this technique. Down below I put an image of someone showing an example of UVing.

I will learn more about what UVs are, how to use them and when to use them later on in the project.
0-1 UV Space and Working Outside the UV Space
A 0x1 UV space is the limit most 3D programs will consider a texture unique, any texture outside this space will become a tiled texture; which is basically the one unique texture that you chose being copied over and over again, which makes them look like tiles. There are programs that let you go outside the limit without tiling, the one I know is Mudbox.

I found this image here https://community.mixamo.com/hc/en-us/community/posts/205825148-UV-out-of-bounds-Error. This image is a perfect example of a 0-1 UV space.
This is an example of a tiled texture, this is what happens when you work outside the Uv space. Tiled texture do have their uses however e.g. making a metallic surface for a factory or a field.

Uv Software and Methods
I'm researching different types of software that are used for UVing, and some of the methods that can be employed to make UVing seem a little less frustrating.
Diamant Tools- While this program is not specifically for UVing, it apparently come with come with some pretty advanced tools for UV mapping.

Roadkill UV Tool- This is a standalone UV tool that has a tool that a very good UV stretch shader, however it's not being updated anymore but a believe people still use it.

Headus- This is yet another stand-alone UV mapping tool, in fact it's even used by professional in the games and visual effect industries (I don't really know if it still being used in the professional setting). While some other programs my have outdone this one, I still think people are using.

Texture Maps
Texture maps are used along with the UV's. These are things that add all the little detail's to your model to make it look really nice. There are lots of different types of texture maps here are the ones I've found.
Colour Map- This one is self explanatory it's basically the colour of your model, you use an already existing texture or paint it yourself . Painting it yourself is the best option, as getting any random texture will probably result in the colour looking unnatural.

Bump map- This can create the the illusion of raised and lowered details on your model. It's really good for texturing faces and adding detail to a plain, to make a textured floor. This is in a collection of maps called pseudo height maps.

Displacement map- They physically alter and shape the geometry of your model to create bumps and creases to help further detail it, these tend to work really well with bump maps. This is another type of pseudo height map.

Normal map- Yet another pseudo height map this one is used a lot in video games to texture objects. they basically determine which way your geometry normal's are facing. If you wanted to make some thing like a brick wall all you have to do is make a brick like pattern, make the normal map and you've got your self a brick wall texture.
.png)
Specular Map- You use this type of map to apply the highlights to your model or to you environment, they can be very useful when trying to texture water or they can be used to make a character look like they are sweating. Those are just a few examples but they are used a lot in video games these days.

Texture / Uv Terminology
I'm researching some of the main texture/UV terminology that are used in 3d modelling.
Shaders- These are different materials that change the light and shadow of your model to achieve different effects.

Transparency maps- Like bump maps transparency maps use a grayscale format to which used black (bits that aren't transparent) and white (bits that are transparent), this creates the illusion of transparency on model.

Baking- You can shorten the time it takes to render by baking the lights in to the texture, when you do this you can delete the lights without actually deleting the illumination on the actual model.
This image has been taken from this site:
http://blog.digitaltutors.com/cover-bases-common-3d-texturing-terminology/

Artist Research- 2nd December 2016
Ray Lederer

Ray Lederer is on of the concept artists for the game Skyrim, this is a painting of the Skyforge in the city Whiterun. The shapes in the concept art have rigid and sharp edges, it looks like everything in this painting was chiselled to look that way. First I would need to model the Skyforge bird, because it's the focal point of the picture. I will then have to model the mountain that the stone bird perches on. I will save all the details like the stairs and the background for last.
Unnamed Artist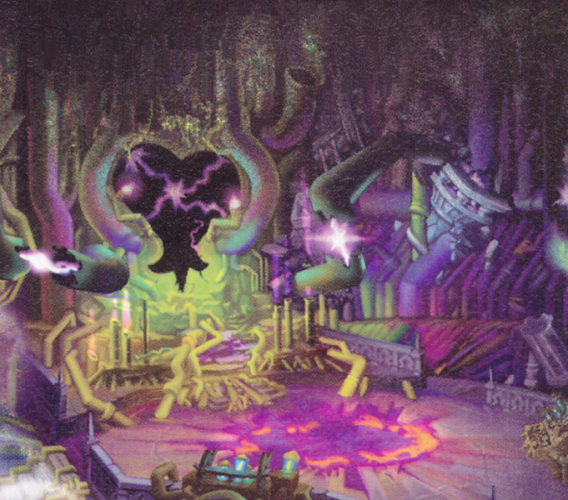
Unfortunately I cannot find the name of the artist who made this picture. I'm not sure whether this is official or independent, this picture is of the Great hall of Hollow Bastion which is from the first Kingdom Hearts game. Shapes in this piece of concept art are mostly pipes, they basically make the environment in this picture. At first I thought I should start from the heart in the centre of the picture, however Chris recommended I should start from the pipes. I decided I would make a simple platform shape and model the pipes by extruding along the curve. Chris also said I should actually do the heart last.
Emerson Tung
This painting is by Emerson Tung, he's one of the concept artists for Doom and the the painting is of the Icon of sin. The shapes in this concept art are very rigid and broken looking. If I model this one I will need to start with the stone platform with the stairs, then I should make the chains, I should then go on to the stone torches and finally I should finish off with the icon of sin.
What is 3D Modelling?
3D Modelling is creating something in a 3D plain, this takes a fair amount of knowledge in scaling and proportion so having maths does help in this case but it's not required to be able to get good at 3D modelling. Modelling like drawing takes practice and time to get good at, once you learn the techniques like extruding along the curve, transformation, duplication etc, you can go on to doing more complicated things because doing theses simple techniques will help you greatly when doing an environment or a really complex piece of architecture. Here are some examples of 3D modelling.


Modular Modelling
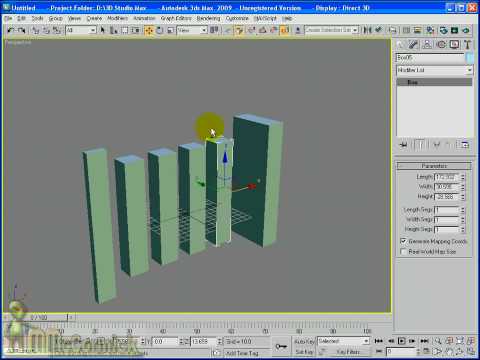
Modular modelling is when your modelling some thing that has a particular pattern, thus you can duplicate the object in order to complete a section of the model. A good example of Modular Modelling would be if your making a row of pillars, you can make one pillar then duplicate it again and again until you've got a full row of pillars.

Unique Modelling
Unique modelling is when you make something that can't be duplicated. A good example of unique modelling would be making the branches on a tree, all the branches on a tree are unique and are not able to be duplicated.

How is Modelling for Games Different from Modelling for Films or any other medium
Meduims like film don't really have to worry about how many poly's they use or framerate issues, because film's that are animated tend to pre-rendered. However in games you are restricted by not only console limitations, but also by the limitations of your game engine. If you have a game with too many polys it will run at an abysmal framerate, your game could look spectacular but if it runs at a snails pace than people are not going to like it.
Film Model (Toy Story made in 1996)
Video Game Model for Ps3 (Gears of War 3 made in 2011)

As you can see even a video game model made for a game in 2011 doesn't have as many poly's as an animated film made in 1996.
Let's look at some older consoles for a comparison the Snes and the Sega Megadrive don't get me wrong both are great consoles that had their stengths and weaknesses. The SNES was evidently quite a bit better looking than the sega megadrive, but it was also a bit slower; On the other hand the Sega Megadrive was quite a bit faster than Snes, but wasn't capable of pushing the kind of graphics that the SNES could. What I'm trying to put across with this example is that having nice looking texture can affect the performance of a game.
Hard Surface/Organic Modelling
Hard surface modelling is when you make no-organic things like robots, factories, ships and vehicles. When your hard modelling the techniques you'll mainly be using are extrusion and scaling, that's why it's so important to learn those techniques. When you first start off this modelling this will likely be the first type of modelling you'll learn.
Here are some examples of hard surface modelling made by other 3D modelers...
A model by Adam Dart for the Junk Fish Art Blog: http://teamjunkfish.com/2015/03/art-blog-25-hard-surface-modelling-techniques-part-1/

This model is by a youtuber named bunnyboxx: https://www.youtube.com/channel/UCuxzcihydUC__5bZDKMPGkw
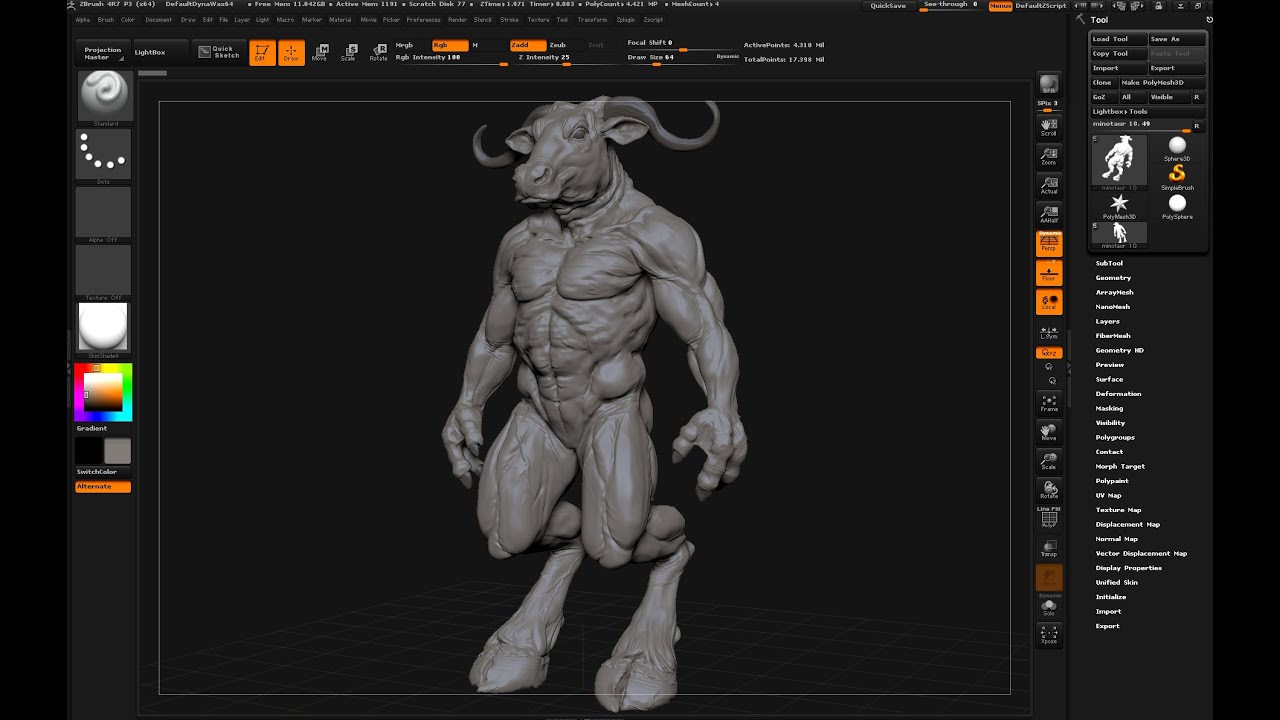
Organic modelling is modelling things like creatures, plants and environments. Organic modelling is harder to pull off than hard surface modelling, it's very important to have good drawing skills to plan out what you model will look like; before you add any details you need to think about the form of your model; you should consider things like the topology of your model and use edge loops.
Here are some examples of organic modelling by other 3D modelers...
Model made by the youtuber Brushboot: https://www.youtube.com/user/bluefley00/videos
Model made by the youtuber RaveeCG Tutorials: https://www.youtube.com/channel/UC4G-ZakanMcOf_GSrp2ZaHA/videos
Environment Modelling
In the last project I made a garage model for my skills sessions, this was to meant to put are skills in Maya to the test.

High Poly/ Low Poly Modelling
Low Poly Modelling
Low poly modelling is basically just working with a limited amount of poly's while making a model. Knowing how to Low poly model is essential if you are on a tight budget or have limited resources, Low poly modelling was used a lot on consoles like the Ps1, Sega Saturn and the Atari Jaguar they had to use low poly models because the game engines and consoles they had to work with were very limited.
Examples of Low Poly Modelling
Star Fox Snes

Final Fantasy 7

High Poly Modelling
High Poly Modelling is working with lots of different polys to be able to make very detailed environments and models. These types of models are used alot more nowadays because of how much more powerful game engines and consoles have become. They don't use high poly modelling for everything in games nowadays because that would take a lot of time and money, they still use low poly models to make the smaller assets and details.
Examples of High Poly Modelling
Final Fantasy XV

Infamous 2

Different Modelling Software
There's lots of different modelling software here are just a few of the programs that I have discovered. These are all apparently good modelling software.
Moment of Inspiration

Mudbox

Blender

Rhino3D

Catia

Maya

OpenSCAD

These are only a few of the potential programs you could use when 3d modelling. Although some of them are very expensive and they aren't all for games specifically.
Modelling Terminology
I'm researching some of the main terminology used in 3D modelling.
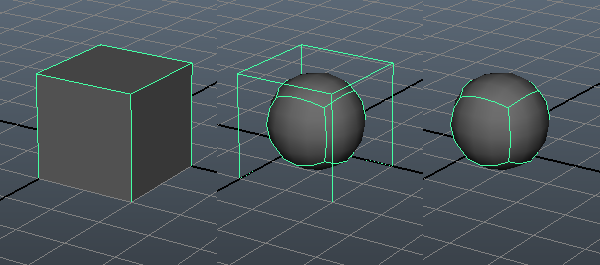
Polygon geometry- Polygons are the most commonly used type of geometry in 3D modelling, however they are not naturally smooth so you need to mess around with geometry a lot more.

Nurb Surfaces- Nurbs are capable of making much smoother shapes than polygons, although you do need to convert them to polygon is you want to put them in a game.
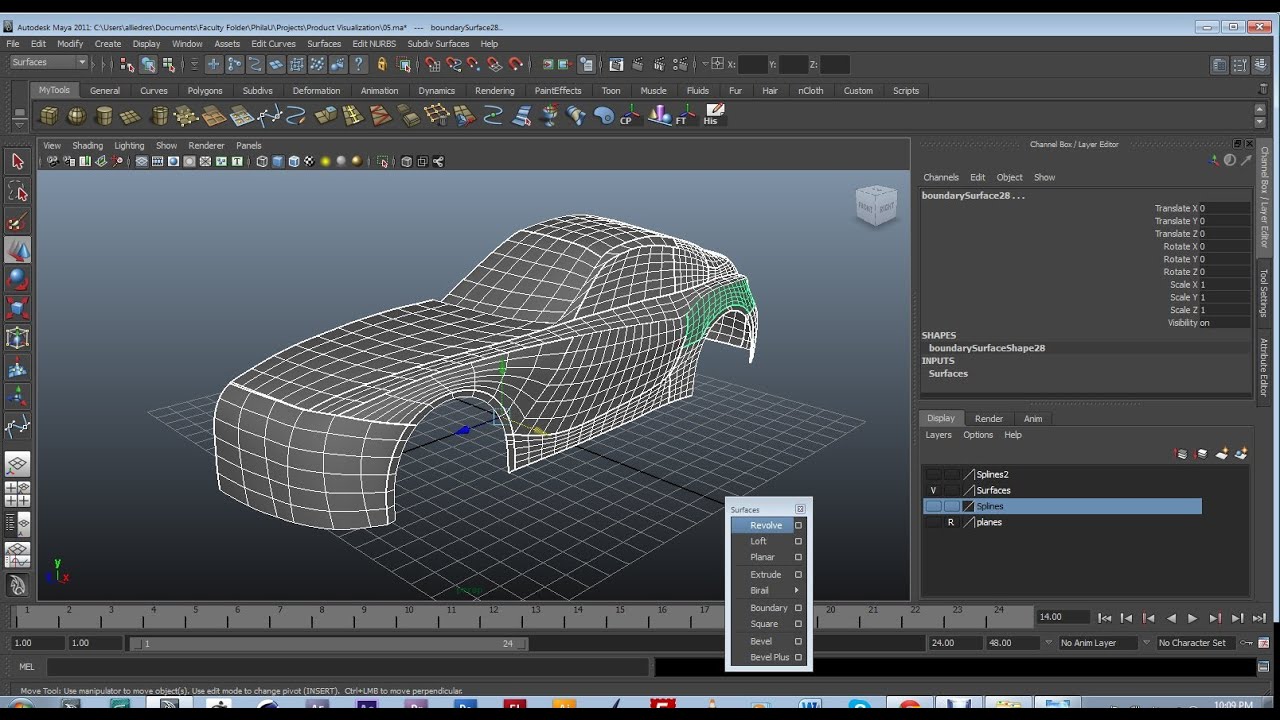
Subdivision Surfaces- They use an algorithm to smooth out polygon geometry automatically, it's a mix of polygonal and NURB geometry.
Faces- Faces are made by having three or more edges connected together, this is where you apply all the shading and detail to a model/environment.

Vertex- The vertex are the small points of a 3D object they can be selected and manipulated individually or in a group.

Edges- Edges define the shape of a model they like vertices can be selected and transformed individually or in a group.

Topology- Topology is essential how your model is structured it's the basically your polygon faces, vertices and the flow of you edges.

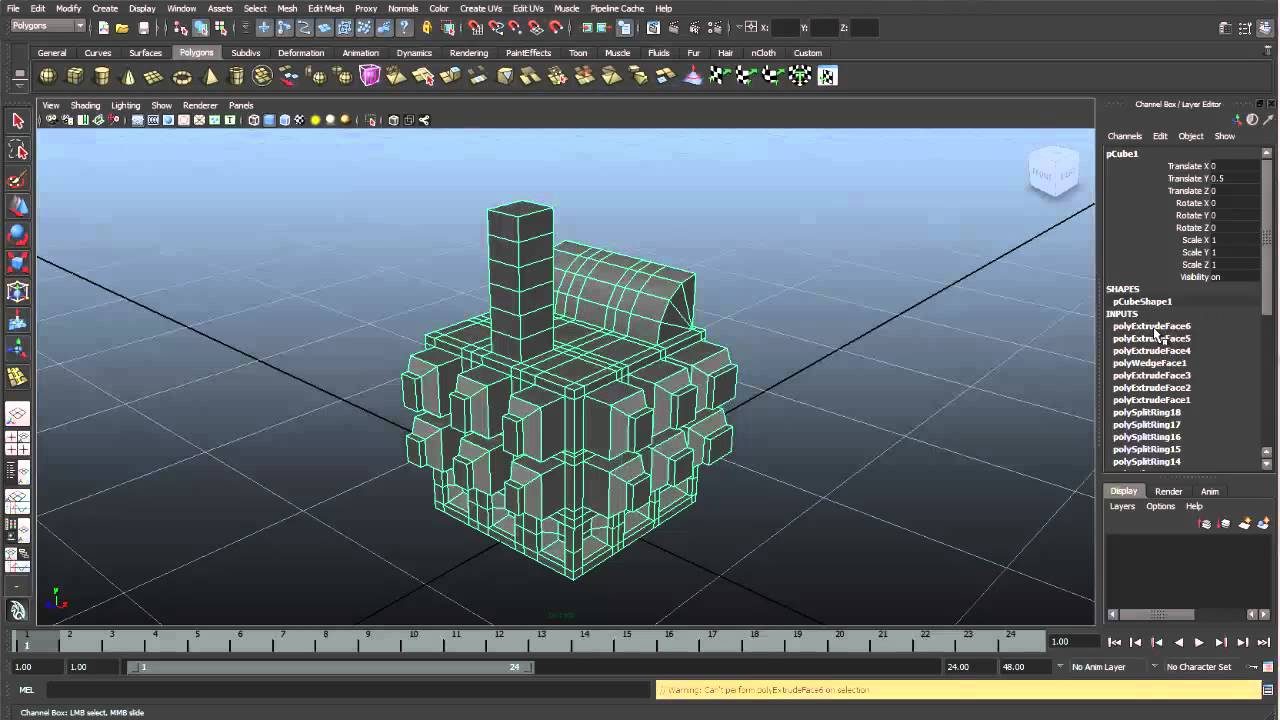
Extrude - Extruding gives additional geometry to your model you can extrude faces and edges e.g. if you have a cube and you want to model a tap, then you can select the face of the cube extrude it and stretch it beyond it's geometry essentially making another shape.

Edge Loop- Edge loop are a ring of connected edges that loop around the object. They are often used in organic modelling, because they are used to maintain hard edges.

Beveling- Beveling enables you to make rounded edges on the object, it basically expands the vertex and the edges to create a rounded a effect.

Triangle- A triangle is a modelling polygon, it's made up of three edges all connected together. They are known to be very annoying to use when creating complex models.

Quad- Quads are the most commonly used polygon when modelling, they are made up of four edges all connected together. These are the most used because they work in almost any model simple or complex.

N Gon- N-gons are never used intentionally, they are made up of five edges or more. N-gons are never used for modelling because they tend to mess up a mesh in the rendering stage.
Normals- Normals are used to show where the light is shining and where it isn't around the geometry of the shape.

Instances- Instances are basically holograms of your model, it gives the illusion of taking up space when it's actually not. Say you need to make an army of soldiers for scene, however duplicating hundreds of soldiers would take up a lot of memory. So instead you make instances which project the look of your model but don't take up any memory like duplicates.
Construction History- Your construction history is everything you've done to your model, you can go back to a particular point in your history and edit it. However it is recommended that you delete your history every so often, because if your history builds up to much it can slow down your computer.
Breaking Down a Concept Piece-7th December 2016
Chris had us break down a piece of concept art in photoshop, we had to break it up into forms, assets and texture maps. We also had to list in what order we had model it in, you always have to start with the hero model (the dominant form of the concept). Finally we had to block it out in Maya, basically it's making the basic forms of the model before adding all the detail.
This is me highlighting the the hero piece and the assets. I also found the texture maps copied them next to the coloured concept art.
This project a need to take a piece of concept a like from another artist. The reason we are taking concept art from another artist is because our main focus in this project is modelling, making a piece of concept art is entirely different job from modelling in the gaming industry the modeller would model and the concept artist would make the concept art, This is usually how it works in the bigger gaming companies.
I will first need to make a mood board of concept art I would want to adapt into a model format.
I have chose eight different pieces of concept art that I would want to model, texture and UV. I will pick three of these to do experiments on and artist research. The I will pick one to model for my final piece.


Action Plan for my Project
Weeks 1 & 2
I will spend 2 weeks on researching for this project.Update my blog.
Week 3
I will start blocking out my model.
Update my blog.
Weeks 4-6
I will finish the blocking out and finish the modelling stage.
Update my blog.
Weeks 7-11
I will use the rest of the project to Uv and Texture my model.
Update my blog.
Do my Evaluation.
What UVs are and Why They are use in Modelling- 1st December 2016
Uvs are nets you would find for 3D shapes for example A cube net is a UV.
I will learn more about what UVs are, how to use them and when to use them later on in the project.
0-1 UV Space and Working Outside the UV Space
A 0x1 UV space is the limit most 3D programs will consider a texture unique, any texture outside this space will become a tiled texture; which is basically the one unique texture that you chose being copied over and over again, which makes them look like tiles. There are programs that let you go outside the limit without tiling, the one I know is Mudbox.
I found this image here https://community.mixamo.com/hc/en-us/community/posts/205825148-UV-out-of-bounds-Error. This image is a perfect example of a 0-1 UV space.
This is an example of a tiled texture, this is what happens when you work outside the Uv space. Tiled texture do have their uses however e.g. making a metallic surface for a factory or a field.
Uv Software and Methods
I'm researching different types of software that are used for UVing, and some of the methods that can be employed to make UVing seem a little less frustrating.
Diamant Tools- While this program is not specifically for UVing, it apparently come with come with some pretty advanced tools for UV mapping.
Roadkill UV Tool- This is a standalone UV tool that has a tool that a very good UV stretch shader, however it's not being updated anymore but a believe people still use it.
Headus- This is yet another stand-alone UV mapping tool, in fact it's even used by professional in the games and visual effect industries (I don't really know if it still being used in the professional setting). While some other programs my have outdone this one, I still think people are using.
Texture Maps
Texture maps are used along with the UV's. These are things that add all the little detail's to your model to make it look really nice. There are lots of different types of texture maps here are the ones I've found.
Colour Map- This one is self explanatory it's basically the colour of your model, you use an already existing texture or paint it yourself . Painting it yourself is the best option, as getting any random texture will probably result in the colour looking unnatural.
Bump map- This can create the the illusion of raised and lowered details on your model. It's really good for texturing faces and adding detail to a plain, to make a textured floor. This is in a collection of maps called pseudo height maps.
Displacement map- They physically alter and shape the geometry of your model to create bumps and creases to help further detail it, these tend to work really well with bump maps. This is another type of pseudo height map.
Normal map- Yet another pseudo height map this one is used a lot in video games to texture objects. they basically determine which way your geometry normal's are facing. If you wanted to make some thing like a brick wall all you have to do is make a brick like pattern, make the normal map and you've got your self a brick wall texture.
Specular Map- You use this type of map to apply the highlights to your model or to you environment, they can be very useful when trying to texture water or they can be used to make a character look like they are sweating. Those are just a few examples but they are used a lot in video games these days.
Texture / Uv Terminology
I'm researching some of the main texture/UV terminology that are used in 3d modelling.
Shaders- These are different materials that change the light and shadow of your model to achieve different effects.
Transparency maps- Like bump maps transparency maps use a grayscale format to which used black (bits that aren't transparent) and white (bits that are transparent), this creates the illusion of transparency on model.
Baking- You can shorten the time it takes to render by baking the lights in to the texture, when you do this you can delete the lights without actually deleting the illumination on the actual model.
This image has been taken from this site:
http://blog.digitaltutors.com/cover-bases-common-3d-texturing-terminology/
Artist Research- 2nd December 2016
Ray Lederer
Ray Lederer is on of the concept artists for the game Skyrim, this is a painting of the Skyforge in the city Whiterun. The shapes in the concept art have rigid and sharp edges, it looks like everything in this painting was chiselled to look that way. First I would need to model the Skyforge bird, because it's the focal point of the picture. I will then have to model the mountain that the stone bird perches on. I will save all the details like the stairs and the background for last.
Unnamed Artist

Unfortunately I cannot find the name of the artist who made this picture. I'm not sure whether this is official or independent, this picture is of the Great hall of Hollow Bastion which is from the first Kingdom Hearts game. Shapes in this piece of concept art are mostly pipes, they basically make the environment in this picture. At first I thought I should start from the heart in the centre of the picture, however Chris recommended I should start from the pipes. I decided I would make a simple platform shape and model the pipes by extruding along the curve. Chris also said I should actually do the heart last.
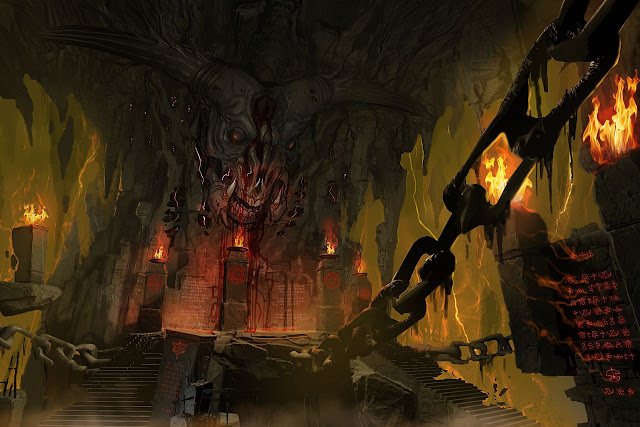
Emerson Tung
This painting is by Emerson Tung, he's one of the concept artists for Doom and the the painting is of the Icon of sin. The shapes in this concept art are very rigid and broken looking. If I model this one I will need to start with the stone platform with the stairs, then I should make the chains, I should then go on to the stone torches and finally I should finish off with the icon of sin.
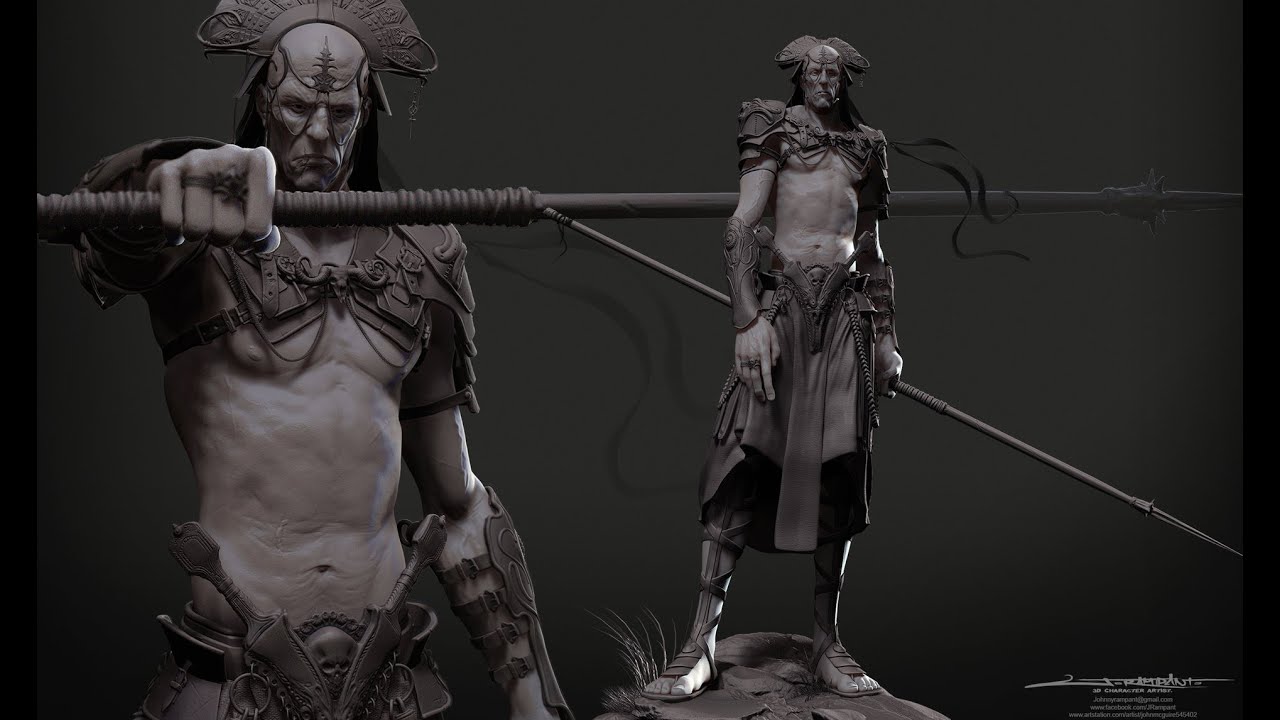
What is 3D Modelling?
3D Modelling is creating something in a 3D plain, this takes a fair amount of knowledge in scaling and proportion so having maths does help in this case but it's not required to be able to get good at 3D modelling. Modelling like drawing takes practice and time to get good at, once you learn the techniques like extruding along the curve, transformation, duplication etc, you can go on to doing more complicated things because doing theses simple techniques will help you greatly when doing an environment or a really complex piece of architecture. Here are some examples of 3D modelling.

Modular Modelling / Unique Modelling
Modular Modelling
Modular modelling is when your modelling some thing that has a particular pattern, thus you can duplicate the object in order to complete a section of the model. A good example of Modular Modelling would be if your making a row of pillars, you can make one pillar then duplicate it again and again until you've got a full row of pillars.
Unique Modelling
Unique modelling is when you make something that can't be duplicated. A good example of unique modelling would be making the branches on a tree, all the branches on a tree are unique and are not able to be duplicated.
How is Modelling for Games Different from Modelling for Films or any other medium
Meduims like film don't really have to worry about how many poly's they use or framerate issues, because film's that are animated tend to pre-rendered. However in games you are restricted by not only console limitations, but also by the limitations of your game engine. If you have a game with too many polys it will run at an abysmal framerate, your game could look spectacular but if it runs at a snails pace than people are not going to like it.
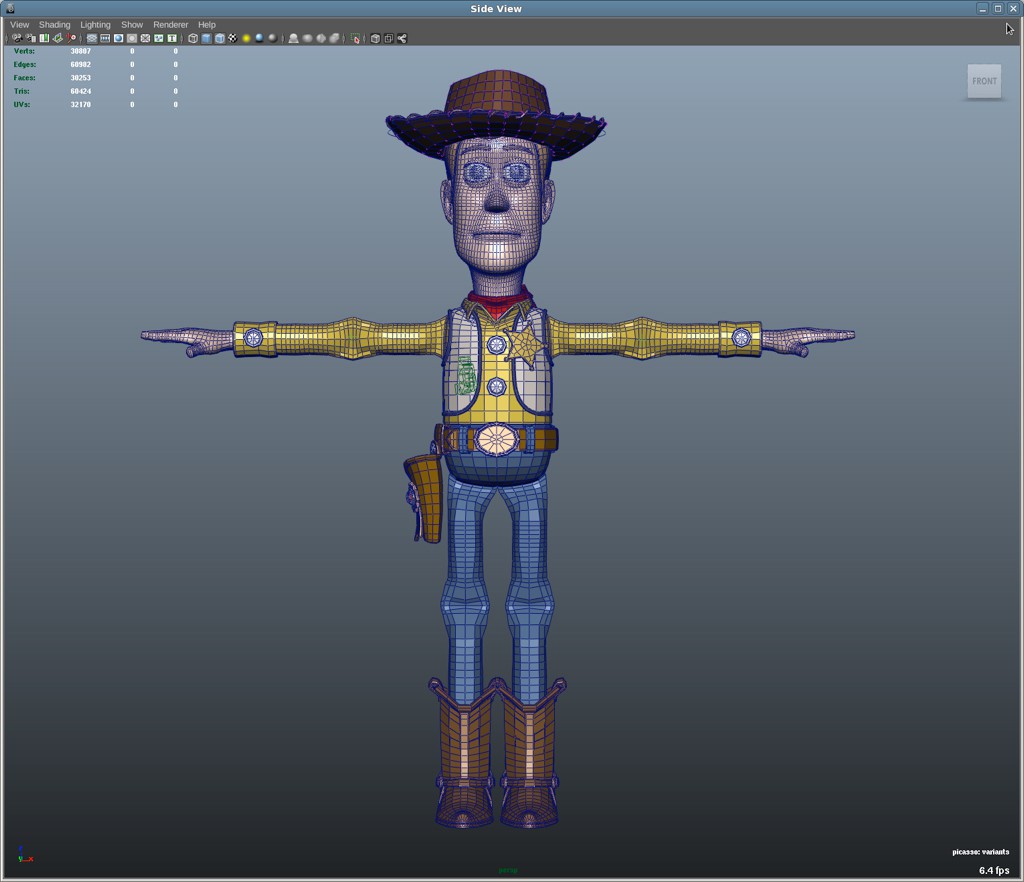
Film Model (Toy Story made in 1996)
Video Game Model for Ps3 (Gears of War 3 made in 2011)
As you can see even a video game model made for a game in 2011 doesn't have as many poly's as an animated film made in 1996.
Let's look at some older consoles for a comparison the Snes and the Sega Megadrive don't get me wrong both are great consoles that had their stengths and weaknesses. The SNES was evidently quite a bit better looking than the sega megadrive, but it was also a bit slower; On the other hand the Sega Megadrive was quite a bit faster than Snes, but wasn't capable of pushing the kind of graphics that the SNES could. What I'm trying to put across with this example is that having nice looking texture can affect the performance of a game.
Hard Surface/Organic Modelling
Hard surface modelling is when you make no-organic things like robots, factories, ships and vehicles. When your hard modelling the techniques you'll mainly be using are extrusion and scaling, that's why it's so important to learn those techniques. When you first start off this modelling this will likely be the first type of modelling you'll learn.
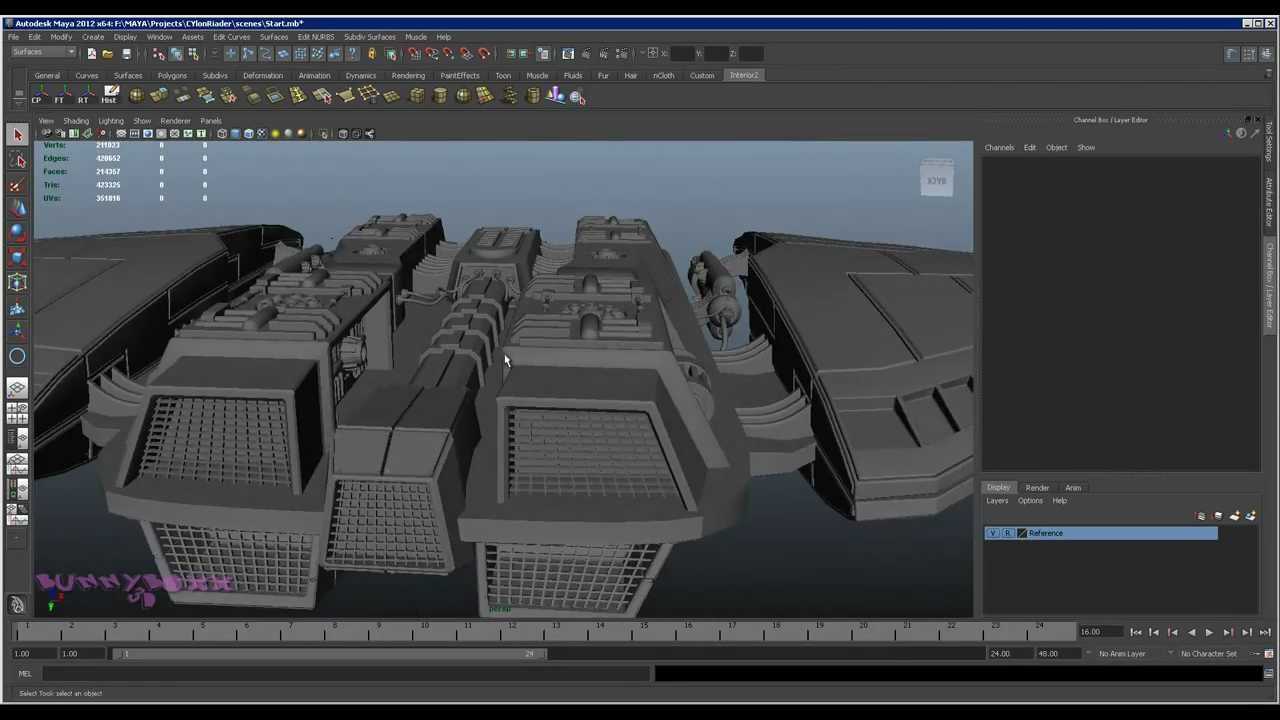
Here are some examples of hard surface modelling made by other 3D modelers...
A model by Adam Dart for the Junk Fish Art Blog: http://teamjunkfish.com/2015/03/art-blog-25-hard-surface-modelling-techniques-part-1/
This model is by a youtuber named bunnyboxx: https://www.youtube.com/channel/UCuxzcihydUC__5bZDKMPGkw
Organic modelling is modelling things like creatures, plants and environments. Organic modelling is harder to pull off than hard surface modelling, it's very important to have good drawing skills to plan out what you model will look like; before you add any details you need to think about the form of your model; you should consider things like the topology of your model and use edge loops.
Here are some examples of organic modelling by other 3D modelers...
Model made by the youtuber Brushboot: https://www.youtube.com/user/bluefley00/videos
Model made by the youtuber RaveeCG Tutorials: https://www.youtube.com/channel/UC4G-ZakanMcOf_GSrp2ZaHA/videos
Environment Modelling
In the last project I made a garage model for my skills sessions, this was to meant to put are skills in Maya to the test.

High Poly/ Low Poly Modelling
Low Poly Modelling
Low poly modelling is basically just working with a limited amount of poly's while making a model. Knowing how to Low poly model is essential if you are on a tight budget or have limited resources, Low poly modelling was used a lot on consoles like the Ps1, Sega Saturn and the Atari Jaguar they had to use low poly models because the game engines and consoles they had to work with were very limited.
Examples of Low Poly Modelling
Star Fox Snes
Final Fantasy 7
High Poly Modelling
High Poly Modelling is working with lots of different polys to be able to make very detailed environments and models. These types of models are used alot more nowadays because of how much more powerful game engines and consoles have become. They don't use high poly modelling for everything in games nowadays because that would take a lot of time and money, they still use low poly models to make the smaller assets and details.
Examples of High Poly Modelling
Final Fantasy XV
Infamous 2
Different Modelling Software
There's lots of different modelling software here are just a few of the programs that I have discovered. These are all apparently good modelling software.
Moment of Inspiration
Mudbox
Blender
Rhino3D
Catia
Maya
OpenSCAD
These are only a few of the potential programs you could use when 3d modelling. Although some of them are very expensive and they aren't all for games specifically.
Modelling Terminology
I'm researching some of the main terminology used in 3D modelling.
Polygon geometry- Polygons are the most commonly used type of geometry in 3D modelling, however they are not naturally smooth so you need to mess around with geometry a lot more.
Nurb Surfaces- Nurbs are capable of making much smoother shapes than polygons, although you do need to convert them to polygon is you want to put them in a game.
Subdivision Surfaces- They use an algorithm to smooth out polygon geometry automatically, it's a mix of polygonal and NURB geometry.
Faces- Faces are made by having three or more edges connected together, this is where you apply all the shading and detail to a model/environment.
Vertex- The vertex are the small points of a 3D object they can be selected and manipulated individually or in a group.
Edges- Edges define the shape of a model they like vertices can be selected and transformed individually or in a group.
Topology- Topology is essential how your model is structured it's the basically your polygon faces, vertices and the flow of you edges.
Extrude - Extruding gives additional geometry to your model you can extrude faces and edges e.g. if you have a cube and you want to model a tap, then you can select the face of the cube extrude it and stretch it beyond it's geometry essentially making another shape.
Edge Loop- Edge loop are a ring of connected edges that loop around the object. They are often used in organic modelling, because they are used to maintain hard edges.
Beveling- Beveling enables you to make rounded edges on the object, it basically expands the vertex and the edges to create a rounded a effect.
Triangle- A triangle is a modelling polygon, it's made up of three edges all connected together. They are known to be very annoying to use when creating complex models.
Quad- Quads are the most commonly used polygon when modelling, they are made up of four edges all connected together. These are the most used because they work in almost any model simple or complex.
N Gon- N-gons are never used intentionally, they are made up of five edges or more. N-gons are never used for modelling because they tend to mess up a mesh in the rendering stage.
Normals- Normals are used to show where the light is shining and where it isn't around the geometry of the shape.
Instances- Instances are basically holograms of your model, it gives the illusion of taking up space when it's actually not. Say you need to make an army of soldiers for scene, however duplicating hundreds of soldiers would take up a lot of memory. So instead you make instances which project the look of your model but don't take up any memory like duplicates.
Construction History- Your construction history is everything you've done to your model, you can go back to a particular point in your history and edit it. However it is recommended that you delete your history every so often, because if your history builds up to much it can slow down your computer.
Breaking Down a Concept Piece-7th December 2016
Chris had us break down a piece of concept art in photoshop, we had to break it up into forms, assets and texture maps. We also had to list in what order we had model it in, you always have to start with the hero model (the dominant form of the concept). Finally we had to block it out in Maya, basically it's making the basic forms of the model before adding all the detail.
This is me highlighting the the hero piece and the assets. I also found the texture maps copied them next to the coloured concept art.

I listed the different models and assets from essential to non-essential.

I blocked out the model in Maya, starting with the hero model. I'm really surprised with how the model turned out, I think it looks quite decent for an experiment.

Concept piece I will Develop into a Model-7th December 2016
This is the piece of concept art I have chosen to model for the environment model project.

Breaking down the environment into one hero model, the assets and the texture maps
I dissected the concept piece in order to get to the main assets, I managed to break it up into six different assets.

This is the order I will model the different assets in, Starting with one and ending with six. The hero asset will probably take about five hours to model fully and the rest will take around 1 to 2 hours each. To UV and texture the hero asset it will probably take around an hour, and the rest could take around 30 mins to an hour. These times are all just speculation however it could be longer or shorter depending and what problems I come across.

Modelling Plan
This is an in depth modelling plan for my project I will go into how long it will take to model each asset, how long it will take to UV each asset and how long it will take to texture them. I will also explain what material I will be using in the process and what textures I'll use.
How long it will take to Model
Model 1: 5 days to model.
Model 2: 3 minutes to model.
Model 3: 3 minutes to model.
Model 4: 20-30 minutes to model.
Model 5: 1 day to model .
Model 6: 2 days to model.
Total days modelling: 8
How long it will take to UV
Model 1: 8 days to UV.
Model 2: 1 day to UV.
Model 3: 1 day to UV.
Model 4: 2 days to UV.
Model 5: 3 days to UV.
Model 6: 5 days to UV.
Total days UVing: 20
How long it will take to texture
Model 1: 2 days to texture.
Model 2: 1 day to texture.
Model 3: 1 day to texture.
Model 4: 2 days to texture.
Model 5: 3 days to texture.
Model 6: 1 day to texture.
Total days Texturing: 10
How long it will take to complete the full process
The Entire Model: 38 days to complete the full process.
How many days in the Project: 77 days in the project.
Refining time: 39 days to refine the model
Materials I will be using on the model
Blinn material: I will use on model 1 and to create a metallic effect.
Phong Material: I will use this material on model 6, this is because it creates a metallic affect but it's slightly less obvious.
Lambert Material: I will use on models 2, 3, 4 and 5.
Practising how to UV-8th December 2016
First I made the cereal box and went into the Uv editor.

I resorted the Uvs and put them into photoshop, from there I painted the texture for the model.

Finally I selected the box pressed ctrl+A to show the material menu, I then pressed the box next to the colour setting: it took me it to the render node menu and I selected image. At first the texture wasn't showing, however I found out you have to press 6 on the keyboard and then it will show. I'm not really proud of the texture work in this picture, I think I could have done much better than a purple box with a skull on it.

Starting to Block Out my Model Environment-8th December 2016
I'm beginning to block out the scene. I'm starting with the stage in order to better understand where the pipes go.

Environment Modelling Idea Presentation-4th January 2017
A presentation for the what environment I would like to model.
Continuing to block out the Environment-10th January 2017
Chris suggested instead of doing the pipes straight away I should map out the where the pipes are going to be by using plains. I did this and I now have a better Idea of where the the pipe walls are going to be and how I'm going to make them.
This is the beginning stages of the environment model.

How to UV a Pipe
To texture a pipe I first need to make sure there are no overlapping vertices, I then had to open the UV editor and unwrap the pipe Uv, then I straightened up the UVs, I saved the file as targa and put it in to photoshop to texture it, when I've finished painting the texture I save it as a 24-bit targa file, finally I attached the texture to the model and click the show textures Icon on Maya.
The Texture didn't really turn out the way I wanted it to, eventually I found out you actually need to select an edge that goes along the mesh and cut the UV's, this way the texture will unfold into a much more workable state.
Continuing to block out the Environment P2-11th January 2017
I had to re position the pipes into a perfect square so I could adjust where the different assets are with far less trouble. I made the pipes on the walls and I'm starting to do the assets that go along with them. As you can see I have put a lot more detail in the assets then before. Finally and this is just a minor thing I increased the size of the model.

I'm trying to make it look more like a room, I added the a plain on top of the environment to make it seem like your actually in a hall. I've now added a few of the pipes that are on the centre plain. I also up scaled the platforms a bit to make room for the pipes that need to be on them.

I've added the jagged stairs and the little pipes by the side, adding these was hard since the image isn't that clear and I couldn't quite make out where they would be in a 3 dimensional space. I also added a few of the pipes that are found around the jagged staircase.

I added more of the pipes found on the floor by the jagged steps on the concept art. I also managed to Uv a pipe all I have to do now is duplicate it to get the fully textured pipe wall. I'm beginning to add in some of the finer details starting with the pipes that can be found on the block.
UVed pipe

Model

I duplicated my textured pipe until I got an entire wall of pipes and I covered up the corner that had no assets with pipes, just so it looks more like an enclosed room. As you can see in the screen shot below I UV-ed the platform I personally think that it makes the seen look more alive, however I still think it looked a bit flat so Chris suggested I should make a normal map for it.
Platform UV

Model

I spent all day Uving and applying bump maps to my model. So far I have managed to add a bump map to the platform I Uved last time, I Uved the stone stairs, finally I Uved and made a bump map for the heart portal in the centre of the environment.
Platform Bump Map

Stairs UV (Coloured)

Stairs Bump Map

Heart Portal UV (Coloured)

Heart Portal Bump Map

Model

After Uving I started to tweak some of the the assets in the model a bit, I added the two mini pillars to the stone fences and I worked into the stairs to make them look like actual stairs with some more pipes. I played around with the rendering tool on maya to get some good shot of my scene, I used the plugin "metal ray" to take these images of my scene. I'm quite impressed with how far I've managed to progress with this model, I think it's turned out quite well considering the concept art I had to work with.


My Final Model- 15th February 2017
I UVed a couple more pipes and decided to finish at this stage, I think it looks surprising good for what I managed to get done. I'm showing both the non-rendered and rendered image, to show you the difference between the rendered image and the model in it's raw form.
Without Render

With Render

Comparing my Model to the Concept art
Here I want to see how well my model compared to the concept art, I personally was surprised with how it turned out. When I first started I thought the model would look terrible, but some how it actually looks okay and I'm fairly proud of it.

Intro
I had to develop my own environment model by finding some concept art, then blocking out the 3D model, then finally UVing and texturing the model. Developing my model was just as hard as I thought, but I did still have quite a few unexpected problems while making the environment.
Finding some 2D Concept Art
Choosing my concept art was definitely the easiest part of the process, basically I made a mood board of eight different concept pieces, then I choose three I wanted to do more research in to and finally I choose one to develop into the final environment. The one I choose was not the most ideal concept piece to be made in to a 3D Model, the piece itself was really dark and some of the more discreet details were not visible. I had to break the model down in to pieces to find out which I should do first and which I should do last, this was harder than it should have been because the concept was so fuzzy and you couldn't make out which asset was the hero model, I eventually decided I would do the pipes first considering they pretty much made up the majority of the hall.
First I needed to block out my environment, doing this is a lot easier said than done because the concept art I chose was very unclear about what objects were what. First I tried to block out at an angled perspective but I was told that would be very hard because adjusting each pipe at the right angle would be very time consuming, so instead I needed to block out in a square and as I went on I found this square shape made the model look nicer, also it just made more sense from a perspective point of view. I didn't make any of the pipes to start off, I just adjusted the plain polygon to represent the shape of the pipes, with the centre platform I just took a cube used the multi cut tool and turned it in to a hexagon, to represent the stone fences I adjusted a cube to make a fence like shape and duplicated it all along the hexagon platform and the arched platform, to make the arched platform I again took a cube used the multi cut tool to add more edges, I selected vertices and pushed them inward to make a square with arched wedge in it.
Then I got to the actual modelling process and this is where the difficulties really started to shine through. First I needed to make the pipes this was easier said than done. I had to get the cylinder polygon and extrude it into a bendy pipe, but the mesh kept messing up and there were tons of glitches, the only thing that was reassuring was the fact that I could just duplicate the pipe again and again, I didn't have to keep recreating the pipe until I finished the wall. The rest of the modelling process went by without that many problems, just the odd glitch every now and again. That's pretty much all have to say about the modelling, this is because most of the detail in this environment will come from the UV and texturing process. For me personally I thought the process of modelling was okay for the most part (despite a few technical difficulties), the process only really started to grate on me when I got to the UV and texturing phase.
UV and Texturing Process
UVing can be really tolerable even fun in some cases, this is definitely not one of those cases in fact this was a terrible first experience with UV's. The main problem that seemed to be on all of my UV's, was that they were all really unclean and I had to do quite a bit of editing just to make them seem presentable. The First problem I encountered was actually getting the UV's to show up properly, every time I tried to unfold them they would just disappear. I got Chris to help and he told me I actually need to put my mesh into a planar map, then I needed to select an edge to be the unfold point of the UV, then I could unfold the UV and edit it properly, save it as a targa file and finally put it in photoshop.
Honestly the photoshop part isn't that bad, all you have to do is know which faces match up to the mesh and paint in those particular faces or a single face to colour the object properly. The next thing I had to do was export it as a 24 bit targa, although I accidentally saved it as a 32 bit so I had to go back and remedy that. When you go to put the texture on your mesh make sure you assign a new material, I didn't and my UV ended up looking transparent and the texture was set to the entire model, this because when you model everything is set to the same lambert material and if you change the colour on that one material, then the entire mesh will be that texture which is really annoying.
Overall the UVing and texturing process was so grating, virtually every UV had some kind of problem and the process of just unfolding them was annoying as it is. This wasn't helped by the fact I thought I had to do my texture again because I set it up wrong, but it was just the fact that I set the texture to the wrong material. The only thing I found satisfying about it was when I bumped mapped both the platform and the heart portal, this is because they looked nice and I actually had a sense of accomplishment when finishing. Most of the time however the UV and texturing process just felt dull and I didn't feel like I was making any progress with the environment, this was easily the worst part of the project for me.
Conclusion
Although I didn't complete the environment I did complete the process I blocked out, detailed, UVed and textured. This environment was just as difficult to make as I suspected. While some things seemed easier, most of the time it was problem after problem. I was pleasantly surprised with how well my model turned out considering what I had to work with, I honestly thought that I couldn't pull it off and while it's far from perfect I would say it looks fairly decent. After this project I can definitively say that my Uving and texturing skills have improved if nothing else. In future projects I should definitely consider choosing a much better image for modelling and I think should look further into things like UVing , I think I should also do more research for the actual modelling process just to make sure my skills are the best they can be.
No comments:
Post a Comment